Dyeing with Fresh Indigo

Persicaria Tinctoria in my dye garden <3
When I first planted Japanese Indigo (persicaria tinctoria) last year, I didn’t know much about the plant. I knew I wanted to try to extract that beautiful deep blue from it but I didn’t know how tricky that could be, or how involved (oh, I tried! Blog post on that later!). I also didn’t know that you could use it fresh, or what range of color it would produce when used fresh.
One of the things I knew was that it could grow in Virginia. If I was going to be planting a dye garden and one of the pigment-producing queens was within reach, it seemed silly not to try to cultivate her. I found some beautiful seeds (via The Dogwood Dyer), started them and put them in the ground. They were some of the hardiest started plants that I planted, one of only two (dyer’s chamomile was the other) to survive the late frost in early May, after I’d eagerly put all my started plants in the ground.
Early in the year I’d stumbled upon the work of Iris Sullivan Daire (in the Community Gallery and is @dreambird.studio on IG) and she works alongside another knowledgeable and dedicated natural dyer, Britt Boles (@seaspellfiber on IG), to form a project called Indigofest (@Indigo.fest on IG). You MUST head to these incredible people’s websites and Instagram accounts, I’ve linked them here - they are REALLY knowledgeable and are amazing teachers if you are interested in this plant. There are lots of people who teach Indigo work, but I can vouch for Britt! It was through following Britt that I found out about the “Fresh Indigo 5 Ways” class that she was hosting virtually on July 25th, last summer. She’ll be teaching another one this summer, so get excited and keep your eyes peeled for announcements about the class!

So that’s how I came to glimpse the cool ways and tones of fresh Indigo. I was fortunate enough to have my own little crop already at that time to work with, so I was able to play around alongside the class.
Pictured left: Britt teaches the Fresh Indigo Five Ways course in the background, in the foreground I strip leaves off indigo stems (such a satisfying snap!)
As the title of the class indicates, we went over 5 ways to use fresh Indigo. I’m not going to go into them here - Britt’s knowledge is valuable and I encourage you to learn directly from her :). If you’re interested in taking a class, contact her through her instagram, or see what Indigofest has to offer in the form of workshops and resources!
I will, however, share some process pics from the class, and the colors I yielded!

You’re going to need a blender for the Blender Method that’s not your usual blender! It’s worth it for other dye processes too!
Fresh Indigo Blender Method on the left (the bright blue is the silk) and Salt Method on the right!

After the Salt Method, I left pieces of leaves on to see how they dried, and they in fact left beautiful deep blue spots behind!!!! I love them. They remind me of robin’s egg speckles.

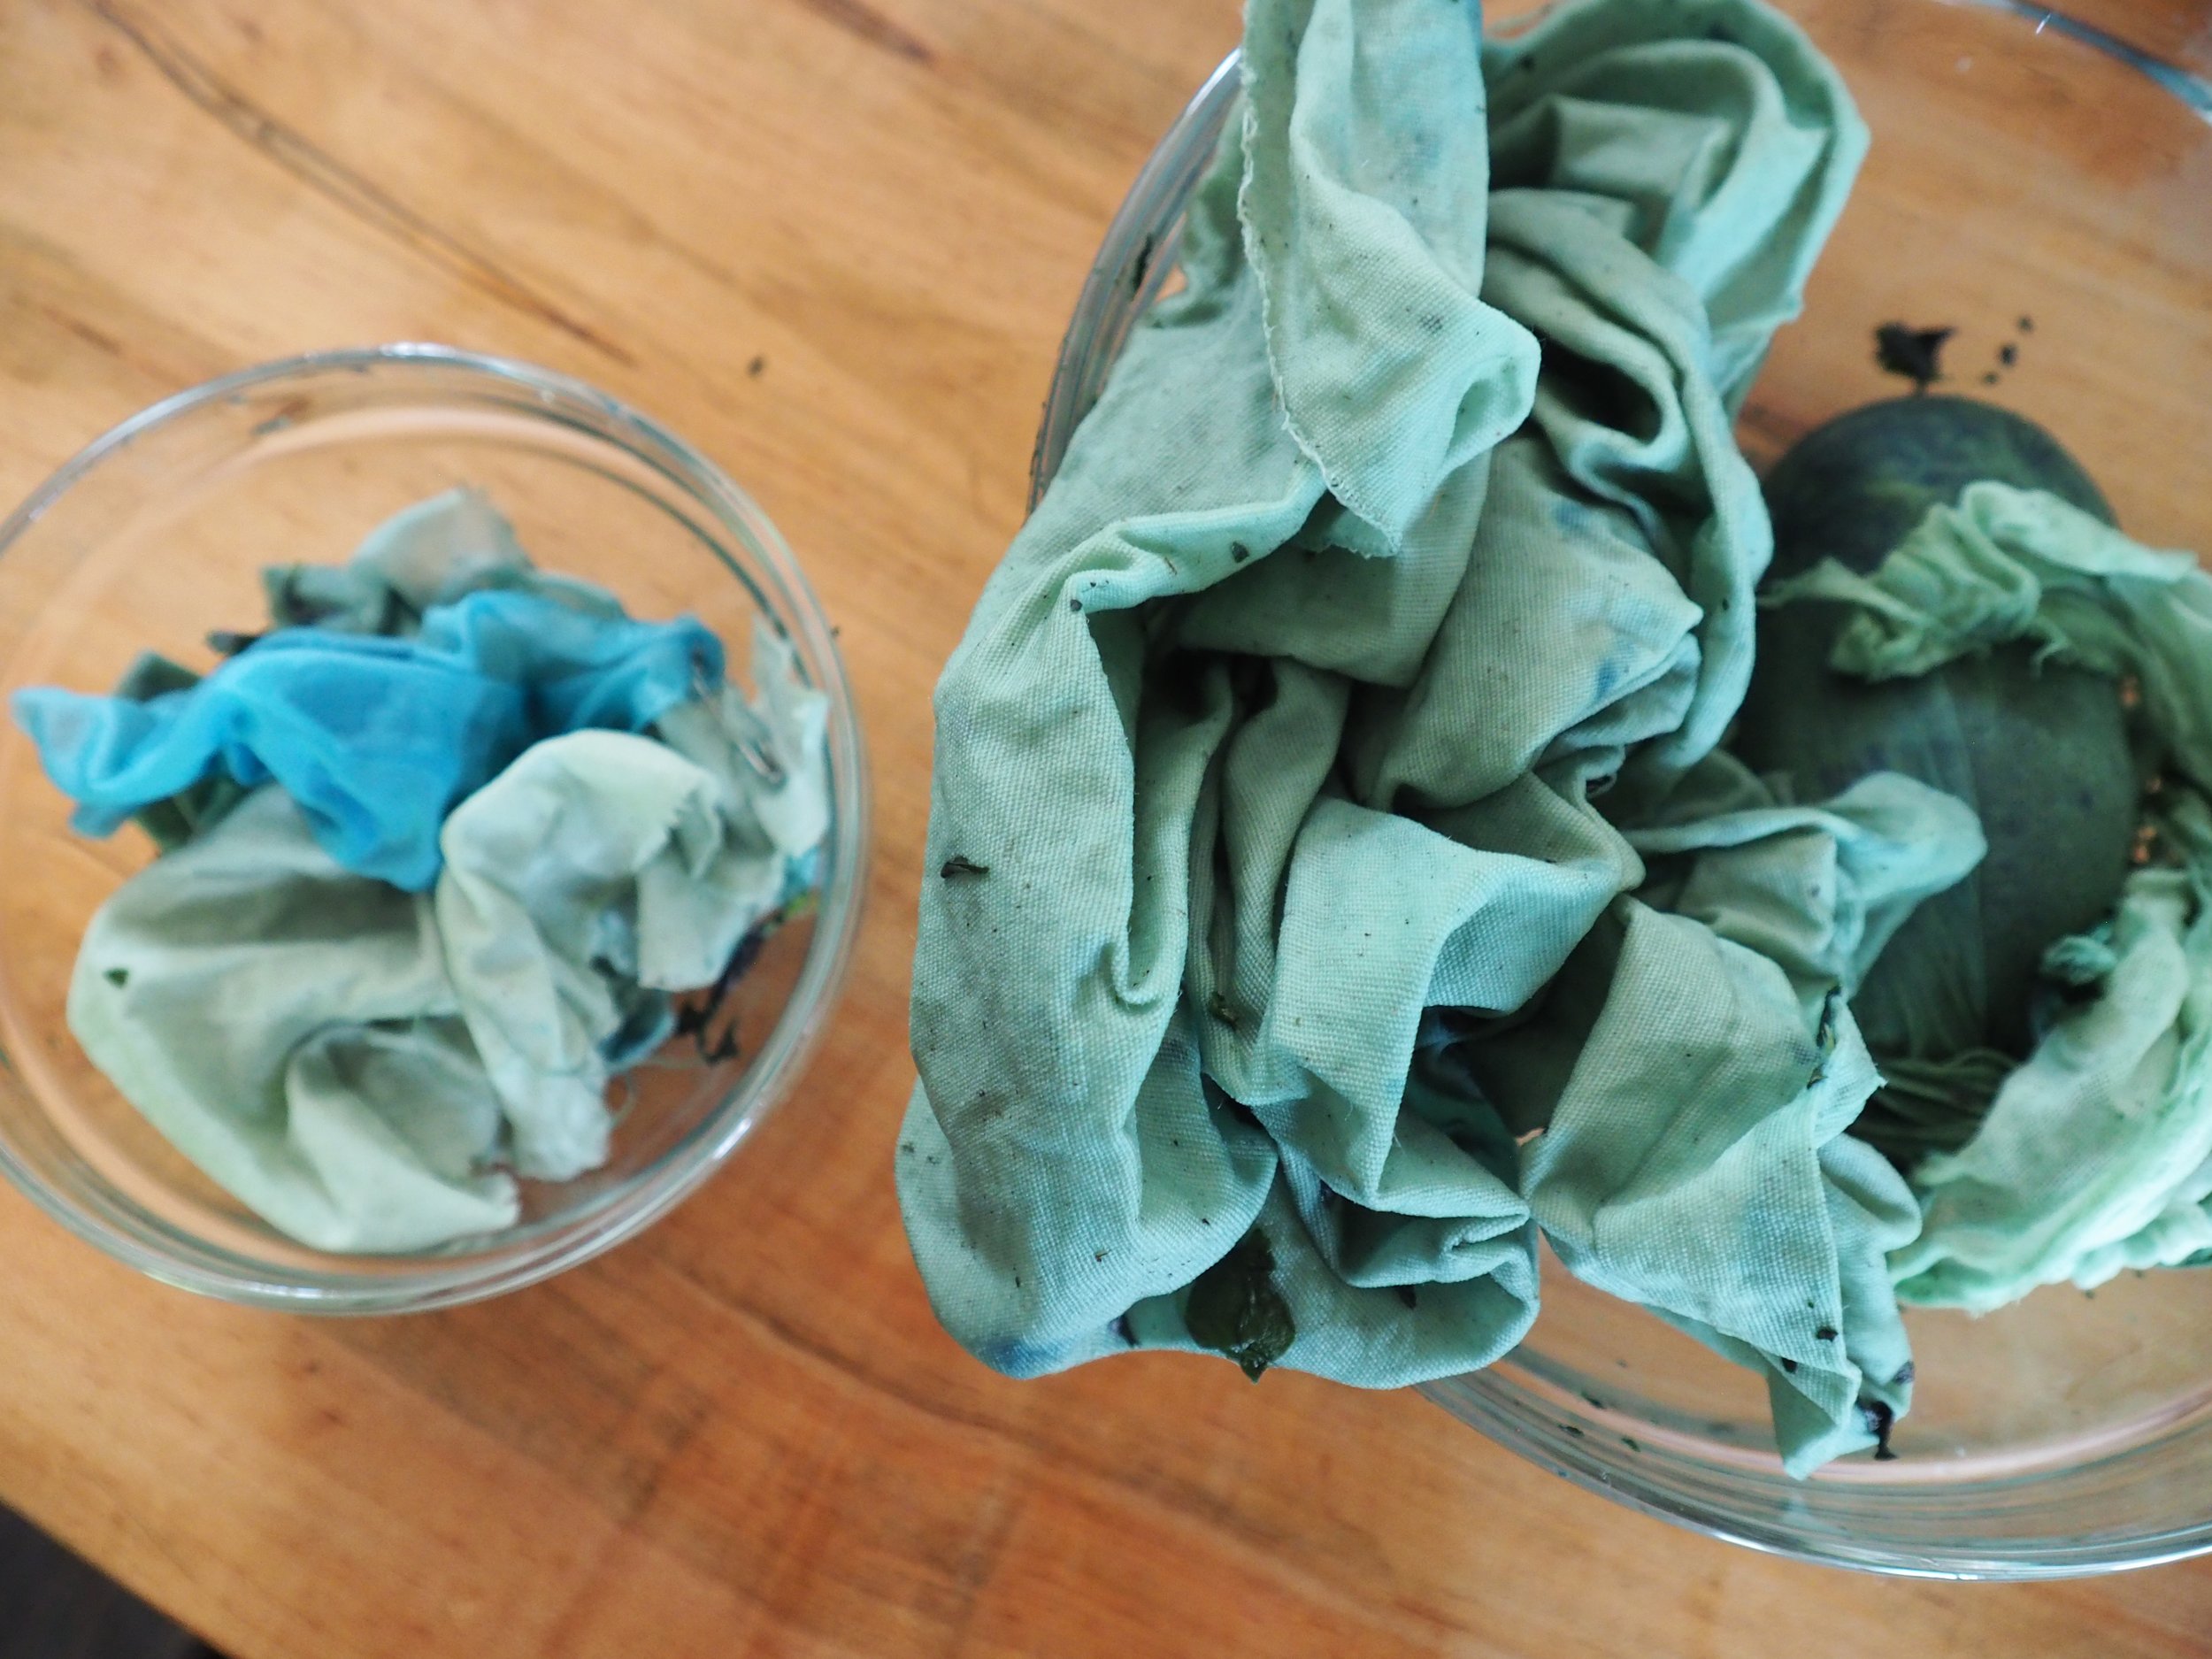
Dried fresh Indigo-dyed fabrics after my class with Britt! As you can see, some of the cottons yielded very little color compared to the silks in the foreground! The greenish cotton was mordanted, the others were not.
A couple things worth mentioning before you play with fresh Indigo:
If you don’t want blue hands (and especially nails), wear rubber gloves!
Wear work clothes, so you don’t get blue splotches on whatever you’re wearing!
If any juicy leaf puddles land on your countertops or table top and it’s not a work table, quickly clean them up because they will leave a deep blue stain behind them if you don’t act fast!
I didn’t realize before taking the class that cotton and other plant based fibers don’t take fresh indigo the way that protein fibers do. If you want to bring prepared fabrics to a fresh indigo class, bring scoured (not mordanted - your teacher will explain why) silks and wools, and if you’re interested in using cotton or other plant based fibers, scour them and instead of mordanting them, give them a soy milk bath. (How to make a soy milk bath below!)
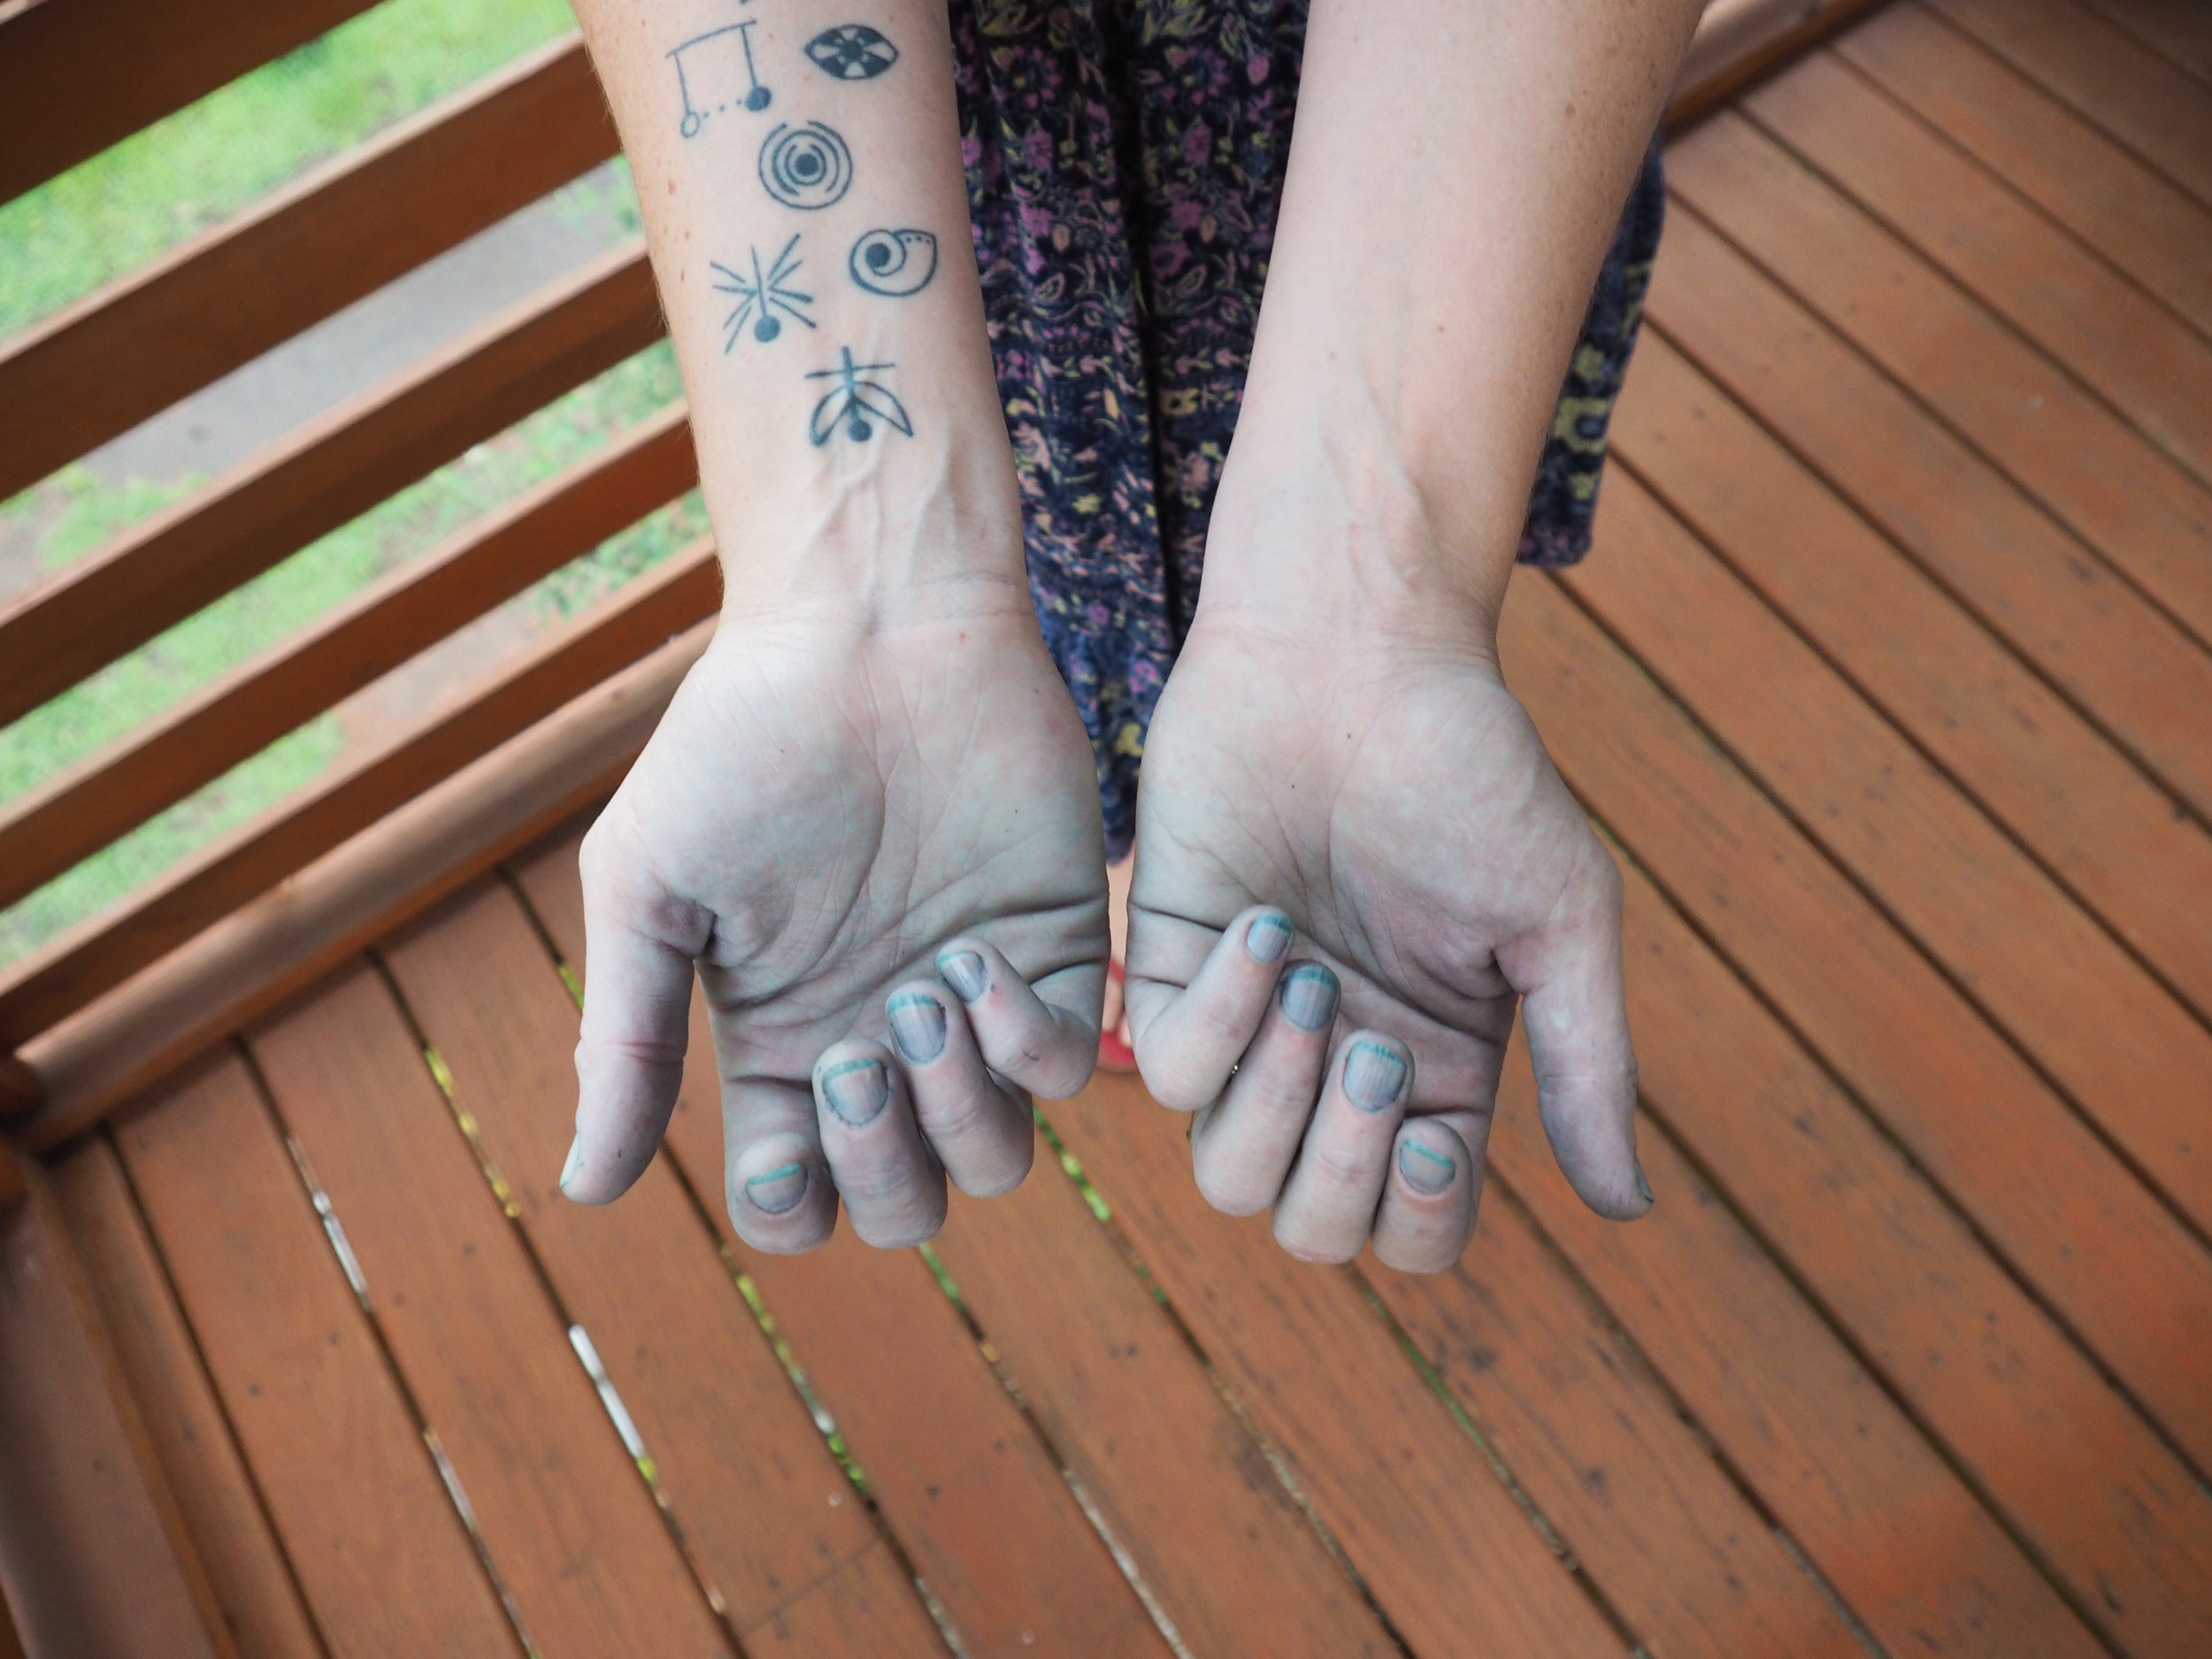
Beautiful blue fresh Indigo hands!
How do I make a soy milk bath?
In Britt’s class she covered how to create a soy milk bath for your plant fibers, which I will share below so that you can arrive at your fresh indigo experiments with soy-cured protein fibers and fabrics already in tow. Britt credits her knowledge on this, as well as her knowledge on the Blender Method, to John Marshall, who wrote ‘Singing the Blues’ (which contains how-to’s and recipes) and is available for purchase via Botanical Colors.
To make a soy milk bath get dried soybeans (they’re available on Botanical Colors and in some health food stores too).
In a blender, soak 1 cup of soybeans in 2 cups water over night
blend them the following day
strain the whole blended liquid through cheesecloth, squeezing it all out - IT WILL BE FROTHY!
add the strained liquid to a clean bucket of water. It’ll dilute it but it’s still potent!
Natural fibers and fabrics should soak for a minimum of 20 mins and no more than 24 hours or so, though leaving it overnight can result in the soy going bad, which isn’t a problem for the process but just smells bad and impregnates your fabric with the smell (I speak from experience). 45 minutes to a couple of hours should do the trick. Without rinsing your soy-bathed fabrics, let them air dry completely. Once they’re completely dry, store them in a clean, dry place for at least a week to “cure”, though it’s not bad to let them sit for a few weeks. The soy protein cured into your fabric binds with the Indigo pigment molecules similarly to the way protein fibers bond to the pigment molecules so you should get deeper shades of color this way, closer to the way silk and wool take fresh indigo tones.
Below are experiments using cotton cured with soy milk (at a later date), and you can see the richer tones!

During the “Salt Extraction” process, early stages.

After “Salt Extraction”, and rinsed free of leafy remains.
Britt has shared a couple of resources with me to pass along to anyone interested in learning more about Indigo: The first is this video demo-ing the Salt Method at a Japanese dye house. And for those interested in extracting Indigo pigment to use for vatting as well as experiments in fresh Indigo, feel free to join Britt’s Facebook group HERE. It’s an incredible resource, and a really neat and supportive community!
I couldn’t recommend learning how to use fresh Indigo more - its really easy, it’s fun, it’s physical and breaks a sweat (especially the Salt Method!). The colors are also so unusual and absolutely gorgeous, personally I love these jade, turqoise and mint tones. I feel like they carry contagious joy, they’re really cheerful <3 Good luck out there and have fun! Follow those sources I mentioned!!